Sheet Pan Quesadilla Recipe: A Quick and Delicious Meal for Any Occasion
Who doesn’t love a cheesy, crispy quesadilla? Whether you’re hosting a party, looking for a simple weeknight dinner, or craving a tasty snack, sheet pan quesadillas are the perfect solution. This versatile dish is easy to make, customizable to suit any taste, and best of all, requires minimal cleanup. In this comprehensive guide, we’ll cover everything you need to know to master the art of sheet pan quesadillas.
Why Sheet Pan Quesadillas?
Traditional quesadillas are typically cooked on a stovetop or griddle, requiring constant flipping and attention to prevent burning. However, by using a sheet pan, you can streamline the cooking process and create multiple quesadillas at once, making it ideal for feeding a crowd or meal prepping for the week ahead.
Benefits of Sheet Pan Quesadillas:
- Efficiency: Cook multiple quesadillas simultaneously, saving time and effort.
- Consistency: Ensures even cooking and uniform browning for perfectly crispy results.
- Versatility: Easily customize each quesadilla to accommodate different preferences or dietary restrictions.
- Minimal Cleanup: No need for multiple pans or constant monitoring; simply bake and enjoy!
Ingredients
Before diving into the recipe, let’s gather our ingredients. Feel free to adjust quantities based on personal preference and dietary needs.
Basic Ingredients:
| Ingredient | Quantity |
|---|---|
| Flour Tortillas | 6-8 |
| Shredded Cheese | 2 cups |
| Cooked Protein* | 1-2 cups |
| Sliced Vegetables | 1-2 cups |
| Olive Oil | 2 tablespoons |
| Salt and Pepper | To taste |
| Optional Extras** | As desired |
*Protein options: Grilled chicken, cooked ground beef, shrimp, or black beans for a vegetarian option.
**Optional extras: Salsa, sour cream, guacamole, diced tomatoes, jalapenos, etc.
Instructions
Now that we have our ingredients assembled, let’s walk through the steps to create delicious sheet pan quesadillas.
Step 1: Preheat the Oven
Preheat your oven to 400°F (200°C) and line a large sheet pan with parchment paper or lightly grease with cooking spray.
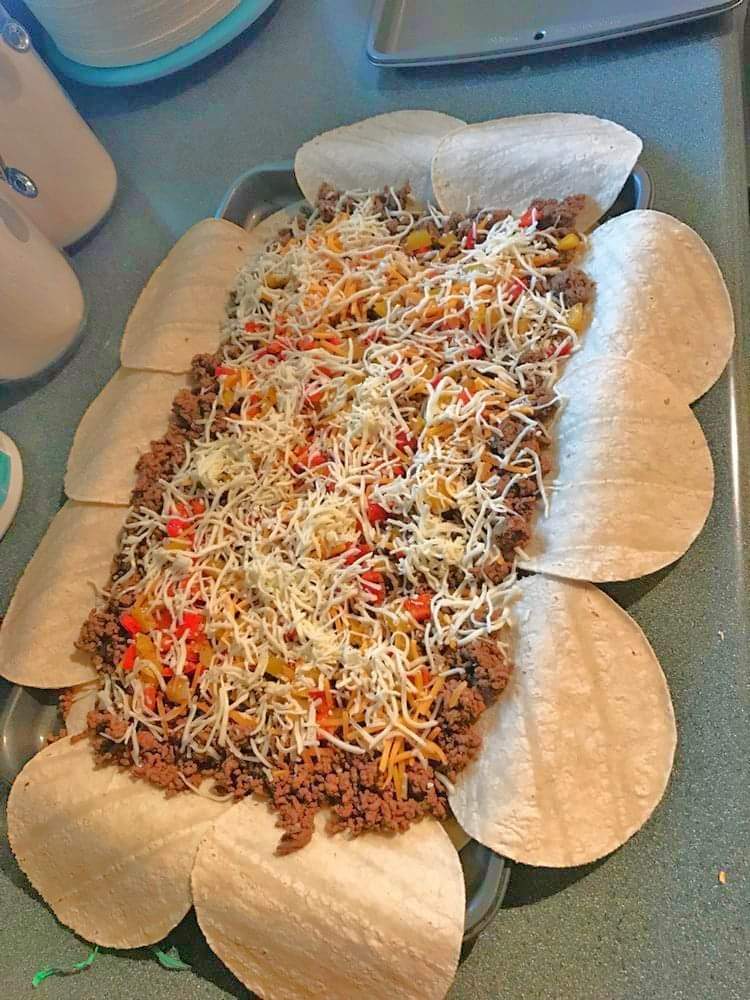
Step 2: Assemble the Quesadillas
Place half of the flour tortillas on the prepared sheet pan. Sprinkle each tortilla with a layer of shredded cheese, ensuring even coverage. Next, add your choice of protein, followed by sliced vegetables and any optional extras.
Step 3: Top with Another Tortilla
Place the remaining tortillas on top of each assembled quesadilla, creating a sandwich-like structure. Press down gently to secure the layers.
Step 4: Brush with Olive Oil
Using a pastry brush or spoon, lightly brush the tops of the quesadillas with olive oil. This will help promote browning and crispiness during baking.
Step 5: Bake in the Oven
Transfer the sheet pan to the preheated oven and bake for 10-12 minutes, or until the tortillas are golden brown and the cheese is melted and bubbly.
Step 6: Slice and Serve
Remove the sheet pan from the oven and let it cool for a few minutes. Using a sharp knife or pizza cutter, slice the quesadillas into wedges. Serve hot with your favorite dipping sauces and toppings.
Tips for Success
- Even Distribution: Ensure toppings are spread evenly across the tortillas to prevent uneven cooking.
- Customization: Get creative with your fillings! Experiment with different combinations of proteins, vegetables, and cheeses.
- Storage: Leftover quesadillas can be refrigerated for up to 3 days and reheated in the oven or microwave for a quick meal on the go.
Conclusion
Sheet pan quesadillas are a convenient and delicious meal option for any occasion. By following this simple recipe and customizing your fillings to suit your taste, you can create a satisfying dish that’s sure to please a crowd. Whether you’re hosting a party, feeding your family, or meal prepping for the week, these tasty quesadillas are sure to become a staple in your recipe repertoire. So why wait? Gather your ingredients and give this recipe a try today!
Now, it’s your turn! Share your favorite sheet pan quesadilla variations and tips in the comments below. Happy cooking!